I wanted to start a new little series here. Since we are remodeling our ENTIRE house, any decorating I do has to be on a low low budget. I still want it to have a high style look though. So I’m going to share my little sprucing up, decorating ideas that I’ve come up with!!
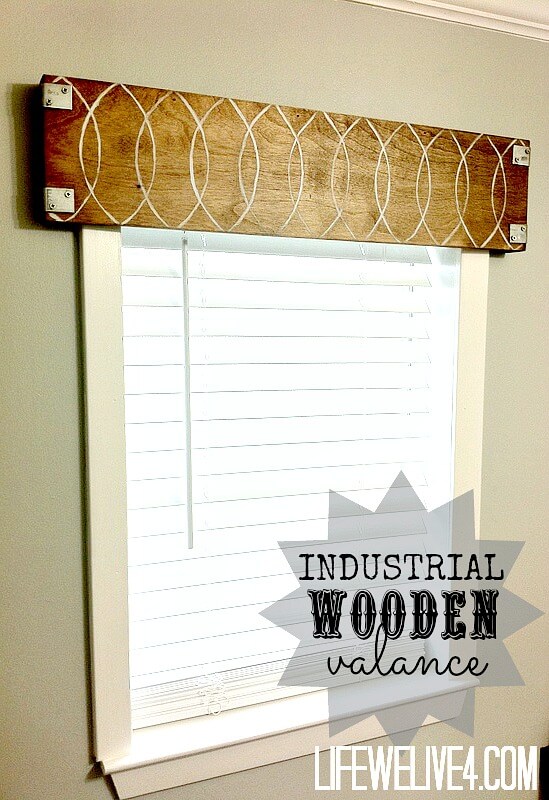
Our first Design is the : Industrial Wooden Valance
I featured this last week over at The Golden Sycamore, go check out Allison over there!!
Okay none of my windows have curtains or any other window treatment! I have curtain anxiety I think. I wanted something over the bathroom window, but I was not in the mood to sew anything, and I don’t really dig a fabric valance. Luckily we have lottsa scrap wood from building our kitchen cabinets,
= this project was almost $ free!
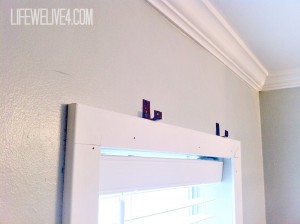
I must give complete credit to MM {the hubby }, I drew up my design, and he far exceeded in building it. He made nifty brackets so that the valance easily detaches from the window, so no screwing into the wall directly!! He made these brackets from 2 “L” brackets. They are bent upwards, making a “u” shape.
Materials Used:
1/4 PureBond Plywood from Home Depot {formaldehyde free}
1×2 shim wood { length will depend on your window}
4 “L” brackets, I found these in the roofing section for $ .56 each.
2 “L” brackets used for the top of window to hold the valance.
Dark Walnut Wood Stain {my favorite}
Wood Filler
Nail Gun {ours is from Harbor Freight} & finishing nails.
white paint {for stencil}
cardboard or cardstock paper {for stencil}
TOTAL COST : $2.24
everything was recycled and re-used except the metal “L”brackets!!
How To Build a Wooden Valence:
1.Mark built a simple box that fit around the window, it extended approx 2 inches to either side of the window. The depth of the box was 1 3/4″.
He attached an additional piece to the top back, that would sit directly into the metal brackets.

2. Attach the 1/4″ plywood to the top, sides and front. Leaving the bottom open so the blinds wouldn’t get in the way. These were nailed in with gun.
3. Use wood filler for all the adjoining seams.
4. Apply “L” brackets to edges. {Instant Industrial Look}

5. Stain with Dark Walnut {my favorite}
6. Make Stencil !! – I used scrap cardboard and cut out an oval shape. I then traced with a pencil around the oval shape approx every 3 inches, to create the overlapping effect. I then painted over the lines with white paint.


7. I gently sanded over the entire area to give it a slightly distressed look, and soften the paint lines
This little project is completely customizable to your window! This took a total time of about 2hours. When we build the second one Im sure it would go faster, since we have a set plan now.


Im so excited for our High:low Projects! Next up…..Subway Tile! oooooooh
Other articles
The Best Furniture Outlet in Sydney
Why Sofa Beds Are the Perfect Space-Saving Solution for Small Homes